Piazza_man project

-
Piazza_man
- Site Admin

- Posts: 863
- Joined: Sun Dec 12, 2010 9:53 pm
You want more updates eh. Well last week I took out the front seat to increase the leg room and head room. Being 196cm tall the seat's current positioning just don't cut it. I did the same thing with my first blue JR and it fit me like a glove. The below pic shows its current maximum seating position. When I told some of the guys what I was doing I was prepared for the 'Hi Tower' comments like 'don't worry about the front seat. Just sit in the back'.
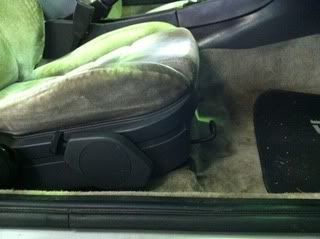
Anyway to achieve the desired result it meant I had to ditch the height adjustment mechanism and lever located on the side of the seat (like my first car). I never had a need for this feature and I never will. Doing this enables me to bring the seat down lower.
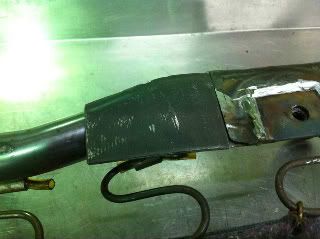
The mechanism is not a real height adjuster as it only lifts the front part of the seat with pivot points at the back (see pic below). The mechanism can be unbolted and removed.

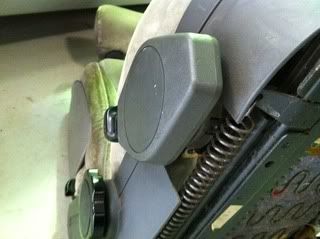
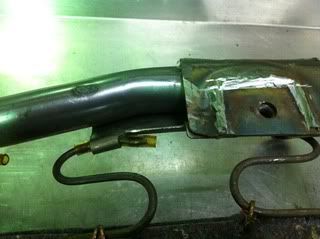
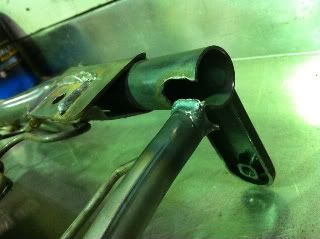
Next step was to reposition the seat back further on the existing rail. To do this i needed to remove the pivot point brackets that are welded to the back of the seat. The brackets are actually welded on to metal plates that are in turn welded to the tubular seat frame. The right side of the seat has a metal plate running almost the entire length of the seat making relocation easy, the left side had only a small plate. To solve this I welded an extra length of plate to the tubular frame. Before and after shots below. You will also see where the rear brackets were originally welded.
This is where I'm up to. Hopefully today I'll be tacking on the brackets and rails and making sure it fits back in the car.
In the meantime I came across a couple of problems with the actual seat which could potentially be a problem for all Piazza/Impulse seats.
Problem 1: the left hand rear corner weld joint was broken.
I didn't realize this was broken until I started taking off the rear brackets, and I didn't notice it in the few times that I have driven it. Judging from the slight surface rust and tarnish at the weld spots I'd say it was like that for quite a while. To fix this it meant taking the whole seat fabric and foam off the frame. The corner has now been welded back on.
That's when I encountered the second issue:
On the right hand side of the seat (for us aussies) there are two bolts that attach the backrest to the seat frame. These two bolts are located next to the recliner knob but is hidden by the plastic panel. On my seat both bold were quite loose. So if you see a bit of free play in your back rest you may want to get those bolts checked.
That's it for now. More pics and stuff to follow after today I hope.
Anyway to achieve the desired result it meant I had to ditch the height adjustment mechanism and lever located on the side of the seat (like my first car). I never had a need for this feature and I never will. Doing this enables me to bring the seat down lower.
The mechanism is not a real height adjuster as it only lifts the front part of the seat with pivot points at the back (see pic below). The mechanism can be unbolted and removed.
Next step was to reposition the seat back further on the existing rail. To do this i needed to remove the pivot point brackets that are welded to the back of the seat. The brackets are actually welded on to metal plates that are in turn welded to the tubular seat frame. The right side of the seat has a metal plate running almost the entire length of the seat making relocation easy, the left side had only a small plate. To solve this I welded an extra length of plate to the tubular frame. Before and after shots below. You will also see where the rear brackets were originally welded.
This is where I'm up to. Hopefully today I'll be tacking on the brackets and rails and making sure it fits back in the car.
In the meantime I came across a couple of problems with the actual seat which could potentially be a problem for all Piazza/Impulse seats.
Problem 1: the left hand rear corner weld joint was broken.
I didn't realize this was broken until I started taking off the rear brackets, and I didn't notice it in the few times that I have driven it. Judging from the slight surface rust and tarnish at the weld spots I'd say it was like that for quite a while. To fix this it meant taking the whole seat fabric and foam off the frame. The corner has now been welded back on.
That's when I encountered the second issue:
On the right hand side of the seat (for us aussies) there are two bolts that attach the backrest to the seat frame. These two bolts are located next to the recliner knob but is hidden by the plastic panel. On my seat both bold were quite loose. So if you see a bit of free play in your back rest you may want to get those bolts checked.
That's it for now. More pics and stuff to follow after today I hope.
-
Piazza_man
- Site Admin
- Posts: 863
- Joined: Sun Dec 12, 2010 9:53 pm
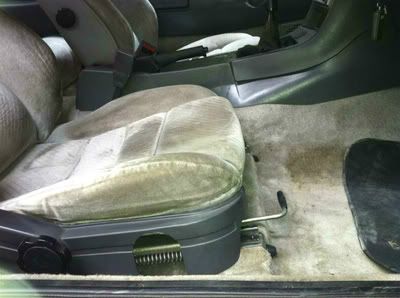
Here is the before and after shot of the seat:
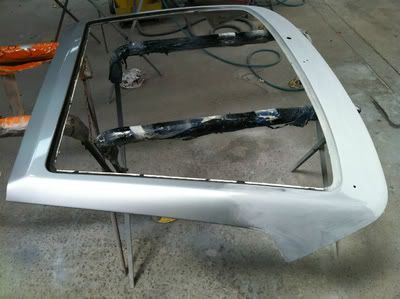
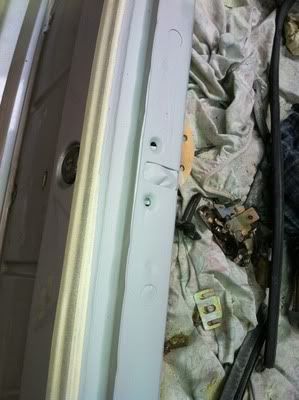
Also did some other stuff. Car is at the paint shop ready for spray. The original tailgate had rust that needed immediate attention:
This was repaired as was a small section near the tailgate latch mechanism.
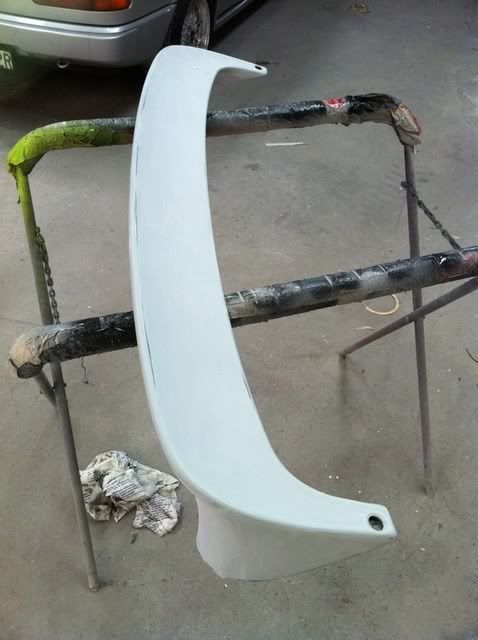
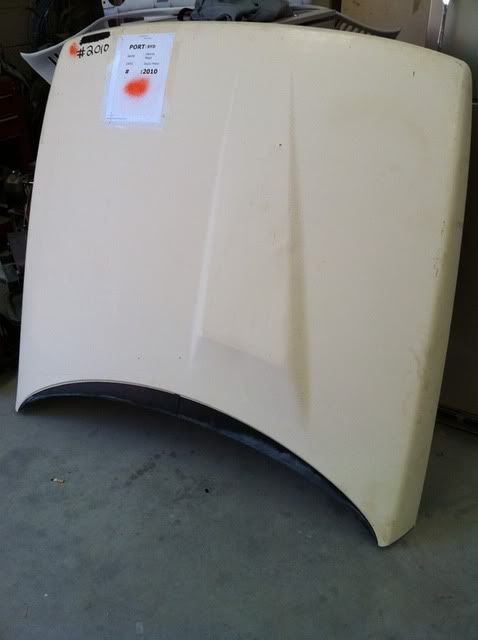
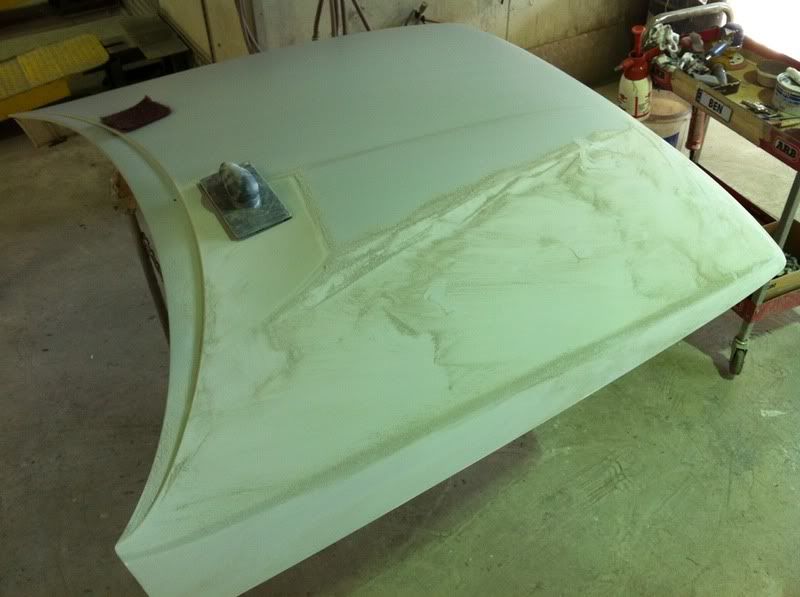
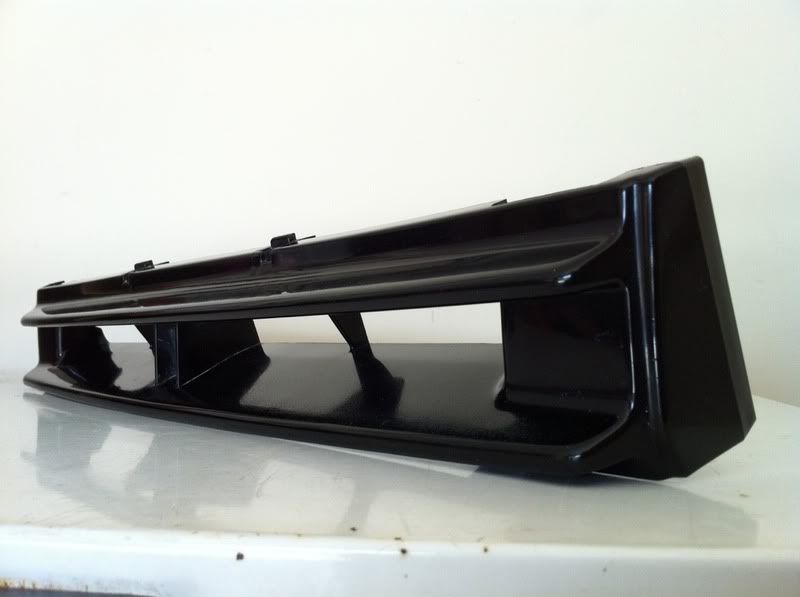
The factory rear spoiler was also prepped, and on Friday I picked up the '88 bonnet from Sydney, along with the '88 grille and grille infill panel.

More pics to follow. The car might be ready to collect at the end of the week.
Also did some other stuff. Car is at the paint shop ready for spray. The original tailgate had rust that needed immediate attention:
This was repaired as was a small section near the tailgate latch mechanism.
The factory rear spoiler was also prepped, and on Friday I picked up the '88 bonnet from Sydney, along with the '88 grille and grille infill panel.
More pics to follow. The car might be ready to collect at the end of the week.
-
Piazza_man
- Site Admin
- Posts: 863
- Joined: Sun Dec 12, 2010 9:53 pm
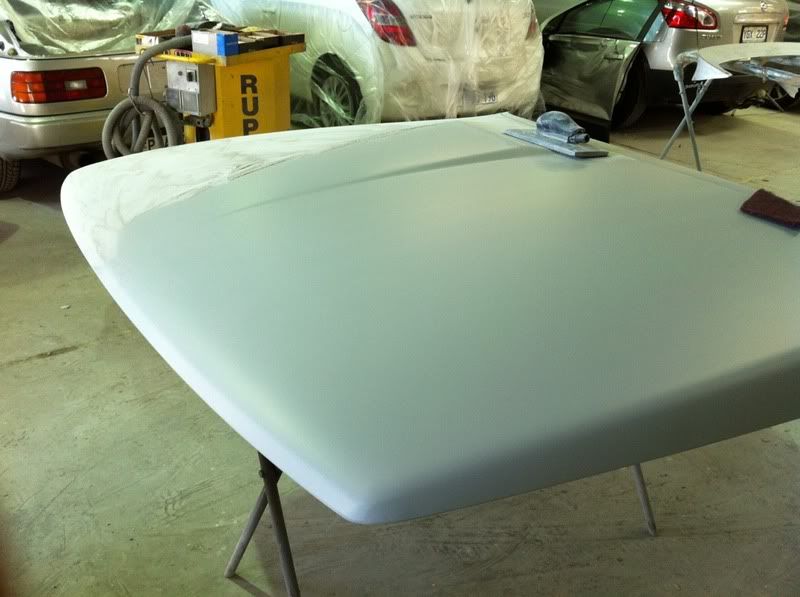
Last week the bonnet was undergoing prepping and smoothing out some minor dents on the bulge area and top left hand tip.
The panel beater calls this a headlight eyebrow. It's of the same material as the mudflaps, which is very flexible. This long thin strip is a necessary addition when fitting the quadlights on. Otherwise an ugly gap between headlight and bumper is exposed.


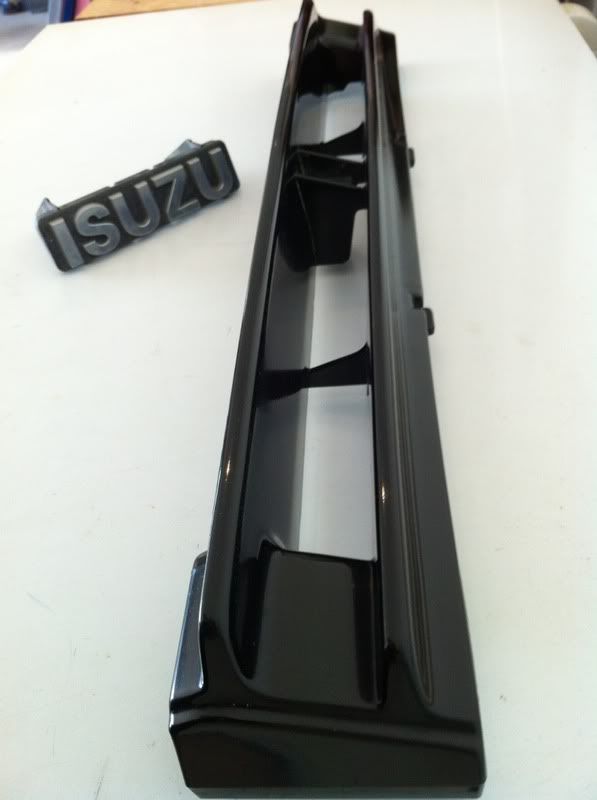
Here is the later model grille all polished up and ready to go. It comes with the original emblem, but I'll be using a current ISUZU logo design instead:
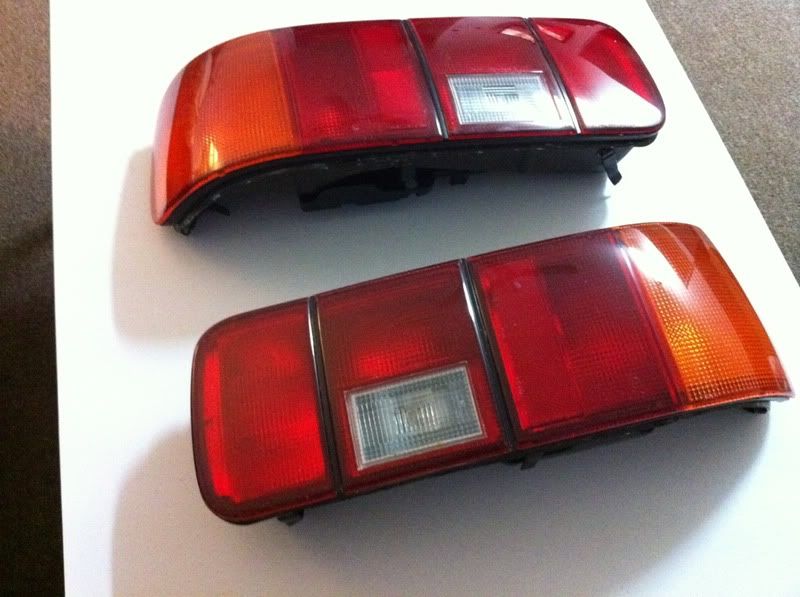
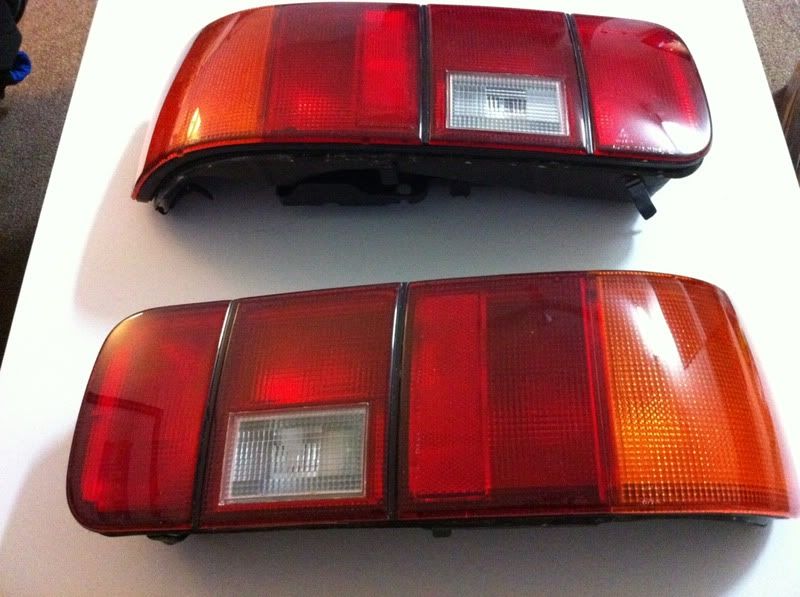
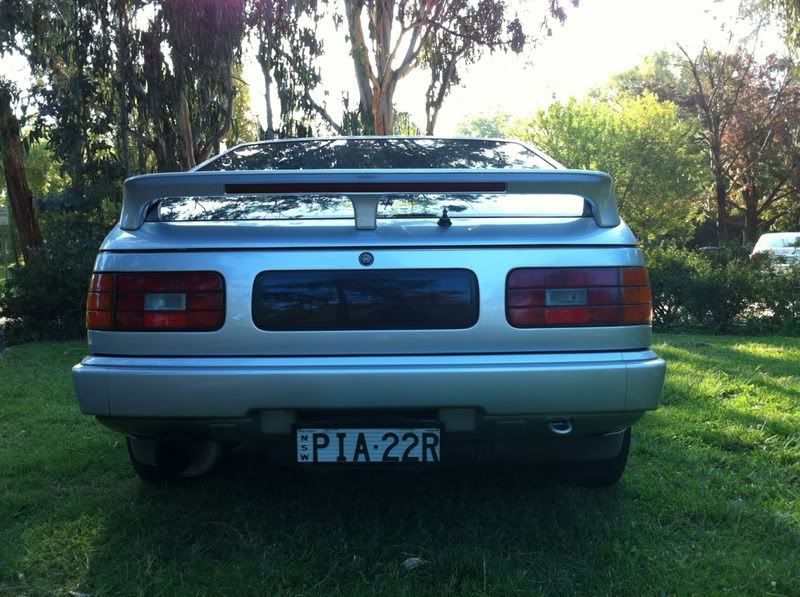
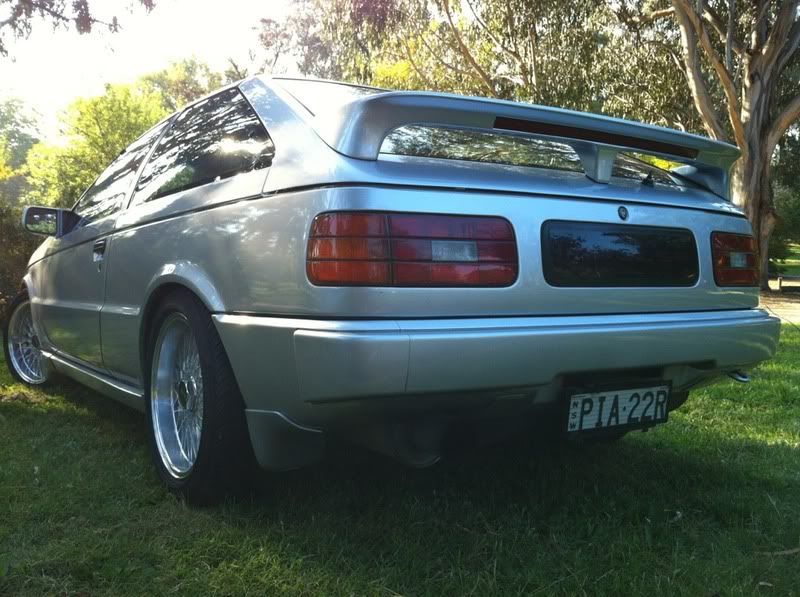
I now have genuine HBL edition used tail lights in excellent condition thanks to Clive from IPTOC. He's my man and an excellent person to deal with. Thank you so much Clive for helping out. I was quite specific about what I wanted and he came through with the goods. What I wanted was the amber turn signals to be on the outer edge, just like our OZ configuration, and thus maintain legality. It turns out these HBLs were the only other style that met my requirement:
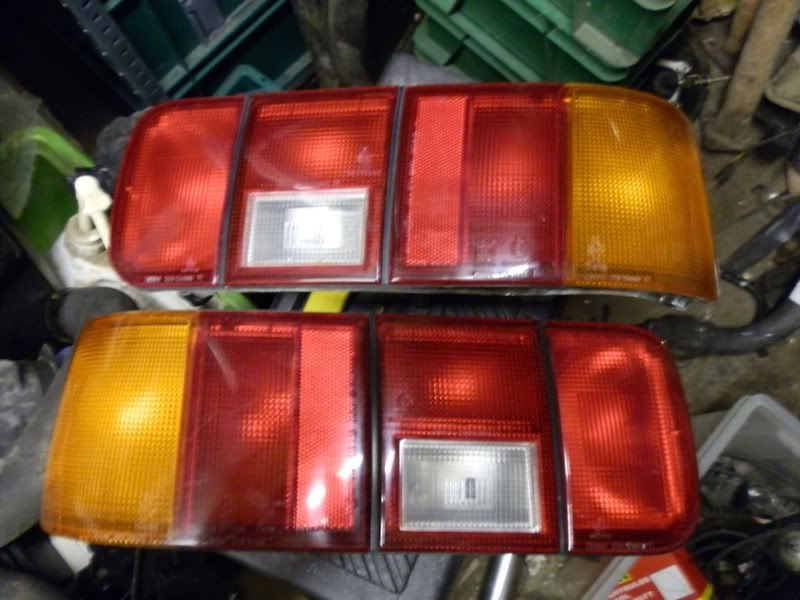
After shaving and slicing away the seemingly endless amount symbols and part numbers off the outer surface I was able to polish out the fine scratches and swirl marks without obstruction. The damn stampings are a magnet for wax/polish residue and dirt, so they had to be painstakingly flattened out. Problem solved now. And the good thing is that the numbers and symbols are still legible. You probably can't tell the difference but they look like new now:
The panel beater calls this a headlight eyebrow. It's of the same material as the mudflaps, which is very flexible. This long thin strip is a necessary addition when fitting the quadlights on. Otherwise an ugly gap between headlight and bumper is exposed.
Here is the later model grille all polished up and ready to go. It comes with the original emblem, but I'll be using a current ISUZU logo design instead:
I now have genuine HBL edition used tail lights in excellent condition thanks to Clive from IPTOC. He's my man and an excellent person to deal with. Thank you so much Clive for helping out. I was quite specific about what I wanted and he came through with the goods. What I wanted was the amber turn signals to be on the outer edge, just like our OZ configuration, and thus maintain legality. It turns out these HBLs were the only other style that met my requirement:
After shaving and slicing away the seemingly endless amount symbols and part numbers off the outer surface I was able to polish out the fine scratches and swirl marks without obstruction. The damn stampings are a magnet for wax/polish residue and dirt, so they had to be painstakingly flattened out. Problem solved now. And the good thing is that the numbers and symbols are still legible. You probably can't tell the difference but they look like new now:
-
Piazza_man
- Site Admin
- Posts: 863
- Joined: Sun Dec 12, 2010 9:53 pm
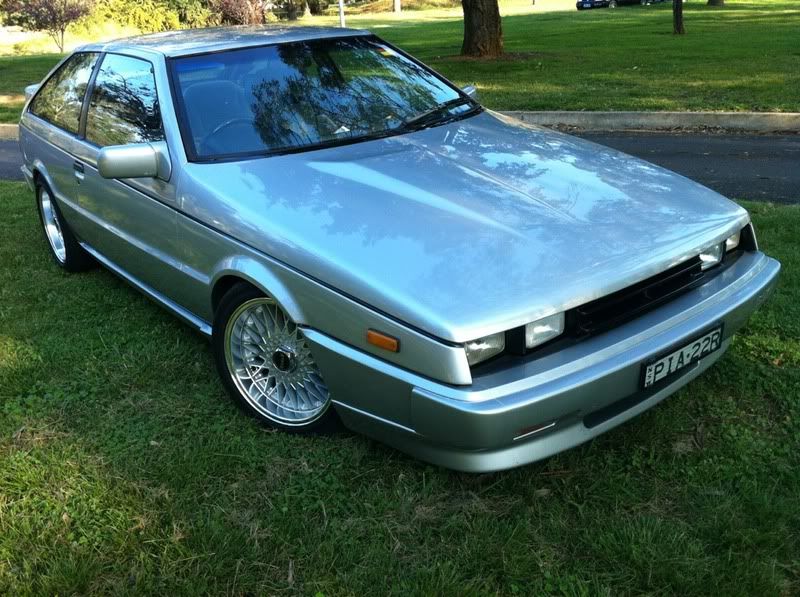
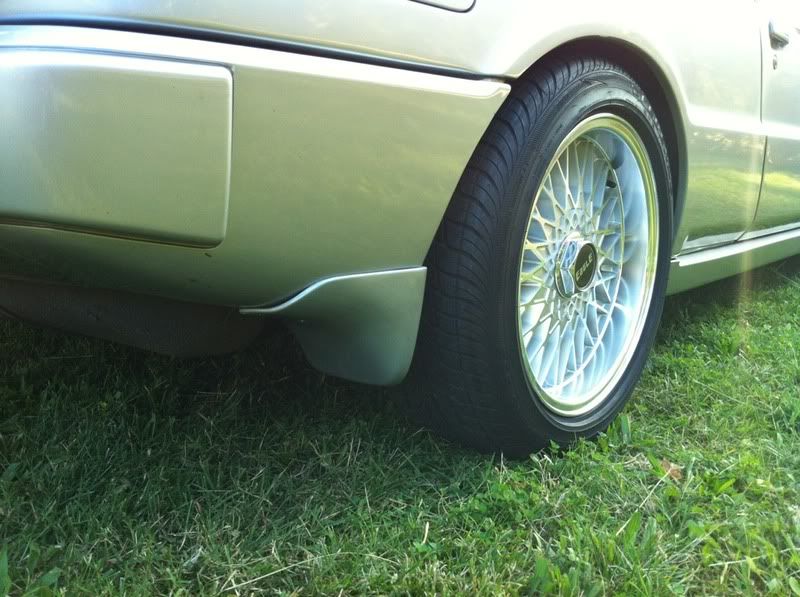
Bugle the front guards were rolled before I got her. To be honest I did get the right rear slightly rubbing on some of the bloody potholes around Sydney when I picked her up. One of the last things that I will do if it still annoys me will be to roll the rears. Maybe it's the type of tires you have that will also make a difference. Mine seem to flair out abit off the rim before tucking back in.
I didn't even think to ask Clive about the Nero badge. Not fussed anyway. I'd be happy with the new ISUZU badge. Don't want to pretend it's something when it's not.
I didn't even think to ask Clive about the Nero badge. Not fussed anyway. I'd be happy with the new ISUZU badge. Don't want to pretend it's something when it's not.
-
Piazza_man
- Site Admin
- Posts: 863
- Joined: Sun Dec 12, 2010 9:53 pm
-
Piazza_man
- Site Admin
- Posts: 863
- Joined: Sun Dec 12, 2010 9:53 pm
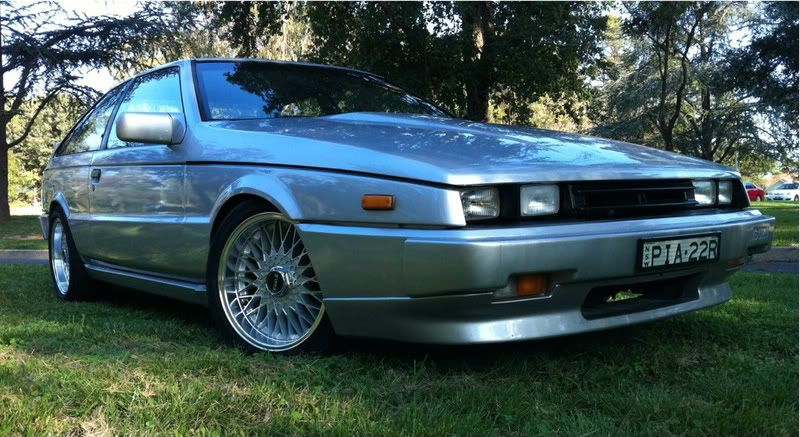
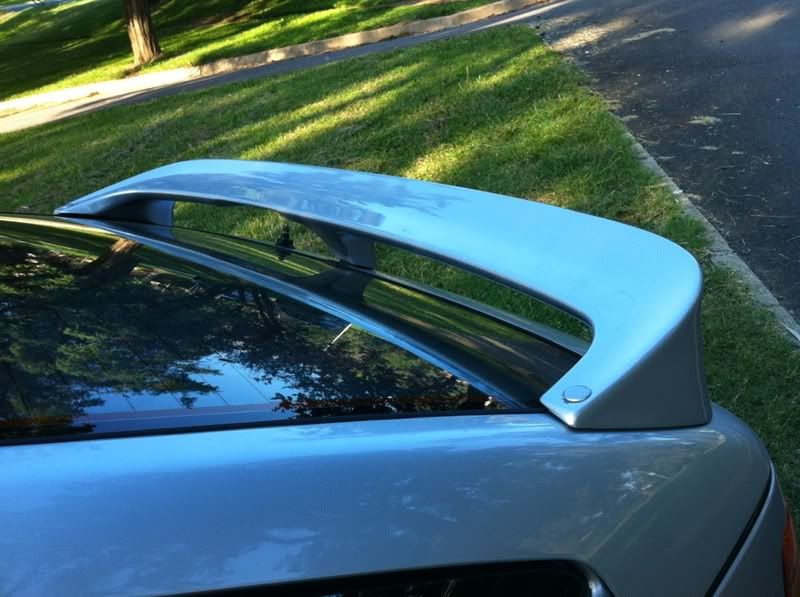
Hey there skrilla my man. Looks even better on the car:
I haven't had a chance to put the rear spoiler wiper blade version on (thanks again Clive from IPTOC). I still need to figure out how to change the cogs on the wiper motor so that the blade sits vertical when in rest position:
The rear spoiler looked like this and came off this wrecking car in the States:
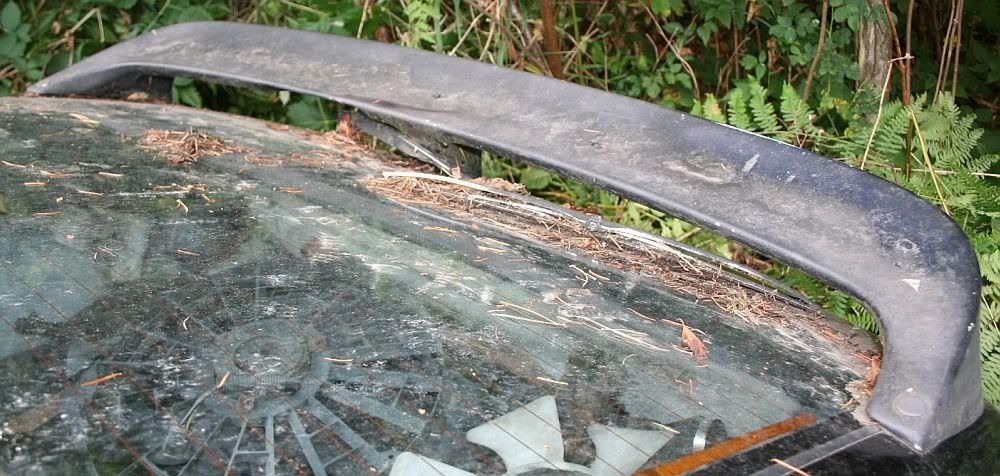
and found a new rightful home here:
I haven't had a chance to put the rear spoiler wiper blade version on (thanks again Clive from IPTOC). I still need to figure out how to change the cogs on the wiper motor so that the blade sits vertical when in rest position:
The rear spoiler looked like this and came off this wrecking car in the States:
and found a new rightful home here:

-
Piazza_man
- Site Admin
- Posts: 863
- Joined: Sun Dec 12, 2010 9:53 pm
-
archangel62

- Senior Member

- Posts: 233
- Joined: Sun Aug 14, 2005 7:07 pm
- Location: Adelaide, South Australia
Wow, love it! Can't wait to see it with the tail lights on. I've been thinking of changing to import tails, and tempted to go the twin headlights, but probably won't.
How did you remove the casting marks on the tail lights? ie, sandpaper, or? Was it hard to polish it to smooth? I've thought about doing this sort of thing but never had the guts, and assumed it'd end badly.
How did you remove the casting marks on the tail lights? ie, sandpaper, or? Was it hard to polish it to smooth? I've thought about doing this sort of thing but never had the guts, and assumed it'd end badly.
Indigo - '76 TX Gemini sedan, G180W+T project,
Abigail - '81 TE sedan, white, G180W ITB project,
New Hotness - TG Gemini drift car, orange, 4ZE1+T
Tardis - 1986 Piazza 4ZC1-T, black, forged, 136rwkw @13psi
Coupe - TX coupe grip car, "do it later", G180W+twin carbs
Trevor aka Jimmy's Gem - Grandpa-spec TD
BA Falcon - Tow car
Abigail - '81 TE sedan, white, G180W ITB project,
New Hotness - TG Gemini drift car, orange, 4ZE1+T
Tardis - 1986 Piazza 4ZC1-T, black, forged, 136rwkw @13psi
Coupe - TX coupe grip car, "do it later", G180W+twin carbs
Trevor aka Jimmy's Gem - Grandpa-spec TD
BA Falcon - Tow car
-
Piazza_man
- Site Admin
- Posts: 863
- Joined: Sun Dec 12, 2010 9:53 pm
You'll need one of those Olfa L retractable knifes with the blades that snap off so you have a constantly sharp blade when you're working. The idea is the shave the tops off them in small stages until you get pretty close to the lamp. Being patient will ensure you don't go knicking/grazing the lamp surface. Then I used a very light cutting compound to smooth away the edges, and then finish off with a polish. Having said that I did manage to graze the lamp here and there but was able to buff them out. I also removed the stamping on the LED part of the rear spoiler. Wax/polish residue is one of my pet peeves.
I cant wait to put the tail lights on too. Apparently I need squeeze a bead of some rubber gooey stuff behind the tail light so that it seals properly against the sheet metal. I might get that today or see if my mechanic has some.
I cant wait to put the tail lights on too. Apparently I need squeeze a bead of some rubber gooey stuff behind the tail light so that it seals properly against the sheet metal. I might get that today or see if my mechanic has some.